
Replacing a Toyota Camry Mirror looks simple, but the job demands patience, correct parts, and careful handling. A cracked housing, loose glass, or failed power adjustment can reduce visibility and make daily driving stressful. The repair also varies by model year, trim level, and mirror features. Heated glass, turn signals, blind-spot sensors, and power-folding functions may require different assemblies.
This guide explains the process in practical, workshop-focused steps. You will learn how to identify the correct replacement, protect the door panel, disconnect wiring, and tighten the mounting nuts safely. Basic tools usually include a trim tool, socket set, screwdriver, gloves, and masking tape. Check the vehicle service information before starting. It remains the most reliable source for torque specifications and wiring details.
Work slowly.
A common mistake is ordering a mirror by appearance alone. Two Camry mirrors may look identical but use different connectors or internal features. Compare the old unit, part number, plug shape, and mounting points before installation. Cover the door with a soft cloth, because painted surfaces scratch easily around the trim. If the replacement mirror does not align perfectly, stop and inspect the gasket or mounting studs. Forcing it can damage the door or wiring.
This article also highlights limitations. Some repairs are manageable at home, while sensor calibration may require professional equipment. After installation, test visibility, adjustment, heating, indicators, and warning systems in a safe location. A properly fitted Toyota Camry Mirror should feel secure, operate smoothly, and provide a clear view before the vehicle returns to normal traffic.
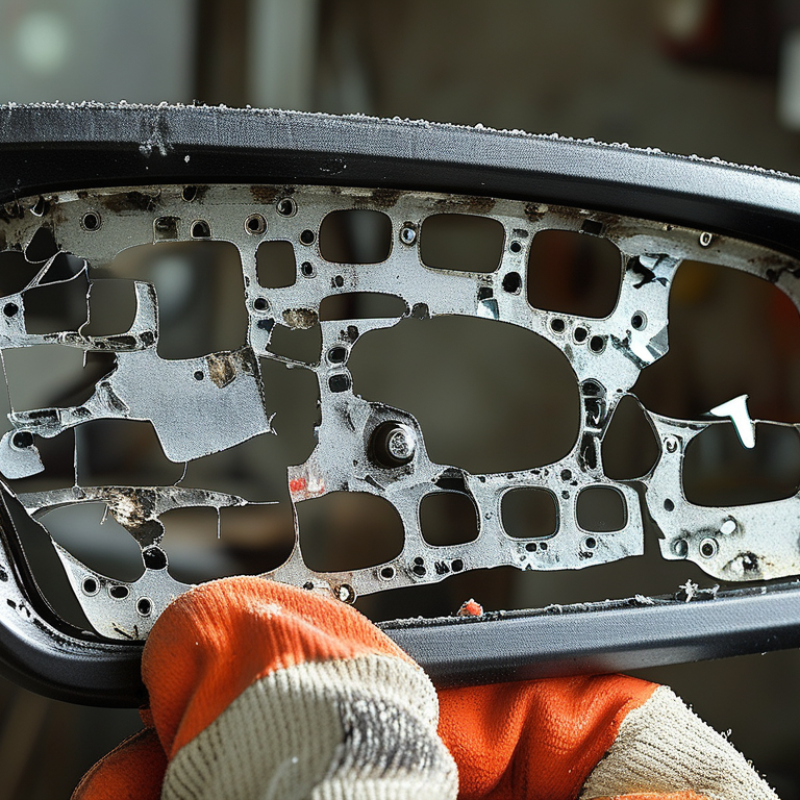
How to Replace a Toyota Camry Mirror?
Identify the Correct Replacement Mirror for Your Toyota Camry
Choosing the correct replacement mirror starts with your Camry’s model year and trim. Different generations may use different mounting points, wiring, and mirror shapes. Confirm whether you need the left or right side. Check features such as power adjustment, heating, folding, turn signals, and blind-spot warning sensors. A mirror that looks identical may still have the wrong connector.
Use the vehicle identification number when checking a parts catalog or asking a qualified technician. Compare the replacement mirror with the original before removing anything. Count the connector pins, inspect the mounting studs, and measure the triangular door bracket. Color matching also matters. A painted cover may need professional finishing, while a primed cover requires preparation. I would not trust appearance alone. Even careful buyers can miss one small electrical feature.
Tips: Photograph the original connector first. Keep the old hardware nearby. Disconnect the battery before handling powered wiring, and protect the door with a soft cloth. Do not force a connector or overtighten the mounting nuts. A loose mirror can vibrate at highway speed. If the mirror includes sensors or heating elements, test every function after installation. Recheck the fit after closing the door. Small alignment errors are easy to overlook.
Use the model-year grouping below as a first fitment check. Before ordering, also confirm the mirror side, body style, mounting connector, power adjustment, heating, turn-signal integration, blind-spot monitoring, and camera equipment.
The chart shows the number of model years in each major North American model-year group. A replacement mirror from one group should not be assumed to fit another group without checking the exact vehicle configuration.
Before replacing a door mirror, park on level ground and switch off the ignition. Engage the parking brake, then open the window if the glass still moves. Disconnect the battery only when the service manual requires it. This prevents accidental electrical movement. NHTSA reported 3,047 distracted-driving deaths in 2022, so keep your phone away during the repair. A clean workspace matters. Small clips disappear easily.
Gather a trim tool, screwdrivers, socket set, work gloves, masking tape, and a flashlight. Use the correct socket, not an adjustable wrench. Cover the door edge with tape before removing the interior panel. Support loose wiring with tape, never by its connector. Take a photo before unplugging anything. This small step can prevent a reversed connection. I still recommend comparing the replacement housing with the old one before installation. Parts that look identical may use different plugs or mounting studs.
Tips: Work slowly. Wear eye protection. Place removed screws in a labeled cup. If the mirror has heating, power adjustment, or signal wiring, test each function before refitting the panel. The Insurance Institute for Highway Safety explains that properly adjusted side mirrors help reduce overlapping blind areas, but adjustment cannot correct a damaged mounting position. After installation, sit normally, set the mirror to minimize vehicle-side overlap, and ask another person to check the housing from outside. Do not rush this check.
Replacing a damaged side mirror begins with careful assembly removal. Park on level ground, switch off the ignition, and lower the window. This gives you room to handle the door trim safely. Wear thin work gloves, because broken mirror glass can leave sharp edges.
Use a plastic trim tool to lift the small interior cover near the mirror mount. Avoid metal tools when possible. They can mark the painted surface. Remove the visible screws, then support the mirror assembly with one hand.
Behind the panel, locate the electrical connector and release its locking tab before pulling it apart. Never yank the wires. They are easy to damage.
Hold the assembly from outside while removing the mounting nuts. A socket with a short extension usually works well in the tight space. Let the mirror come away slowly. Check for hidden clips or a cable before pulling harder. I once rushed this step and bent a connector bracket, creating an unnecessary repair. Inspect the door skin, wiring, and rubber seal for cracks or moisture.
If the mirror includes heating, folding, or signal functions, photograph the connector position before removal. It is a small detail, but it prevents confusion during installation. Recheck every fastener later; loose hardware can cause vibration and wind noise.
Replacing a damaged side mirror starts with controlled removal. Park on level ground, switch off the ignition, and disconnect the negative battery cable if the mirror is powered. Remove the interior trim carefully. A plastic tool prevents scratches around the door panel. Unplug the mirror connector before loosening its mounting nuts. Support the mirror from outside. It can drop suddenly.
Clean the mounting surface and inspect the door for bent metal or cracked clips. Fit the new mirror with its foam gasket seated flat. Tighten each nut evenly, using the vehicle’s service-manual torque specification. Do not crush the gasket. That mistake can create wind noise and water entry. Reconnect the wiring, then secure the trim until every clip clicks firmly. Test adjustment, heating, turn signals, and blind-spot alerts, when equipped. The Insurance Institute for Highway Safety reports that blind-spot monitoring reduces lane-change crashes by about 14 percent. A loose connector can defeat that benefit. Check twice.
Adjust the glass from the driver’s seat. The mirror should show a narrow slice of the vehicle’s side, not half the door. NHTSA’s FMVSS 111 requirements emphasize defined rear visibility through mirror systems. After installation, drive slowly in a quiet area and listen for vibration. I would recheck the fasteners after the first longer trip. It feels excessive, but small movement becomes obvious at highway speed. Forgetting one connector is easy. That is the part worth questioning.
After replacing a sedan’s side mirror, test it before leaving the driveway. I use a helper and keep the vehicle parked on level ground. Check the glass, housing, adjustment switch, heating element, and turn indicator, if fitted. Move the mirror fully up, down, inward, and outward. It should respond smoothly without clicking, shaking, or stopping early.
The Highway Loss Data Institute reported that blind-spot monitoring reduced lane-change crashes by about 14% in its insurance-loss research. A loose mirror can defeat that safety benefit. Compare both sides from the driver’s seat. The rear door edge should occupy only a small part of the view. Adjacent traffic should become visible before it reaches the vehicle’s rear quarter. Look for vibration at idle, then during a slow drive on a quiet road. Keep both hands available. Do not adjust the mirror while moving.
Inspect the mounting area again. Check every fastener by hand, confirm the wiring connector is locked, and listen for wind noise around the mirror base. I once missed a partially seated connector; the glass moved, but the heater failed later. That mistake was avoidable. The National Highway Traffic Safety Administration recorded 40,901 traffic deaths in 2023, showing why small visibility defects deserve serious attention. Test the mirror after the first trip, too. Vibration may reveal a problem that a stationary inspection misses. Keep the old mirror nearby until all functions pass.
| Stage | Inspection Item | Test or Action | Recorded Result | Status | |
|---|---|---|---|---|---|
| Preparation | Vehicle power isolation | Switch off the ignition, remove the key, and disconnect the negative battery cable before removing electrical connectors. | Power is isolated before connector removal; the cable terminal is secured away from the battery post. | Completed | Pass |
| Removal | Interior trim and fasteners | Remove the interior mirror cover and loosen the retaining nuts with the correct socket. Keep fasteners in a labeled container. | Trim clips are released without cracking the panel, and no fastener or clip is missing. | 3 fasteners retained | Pass |
| Installation | Replacement mirror seating | Position the mirror assembly against the door, route the wiring through the opening, and hand-start all retaining nuts before tightening evenly. | The mounting surface is flush, the wiring is not pinched, and the mirror housing has no visible gap at the base. | Flush; no gap | Pass |
| Installation | Electrical connector security | Reconnect the mirror harness until the locking tab clicks. Lightly pull the connector to confirm that it is latched. | Connector is fully seated, locking tab is engaged, and wires are free from sharp edges or excessive tension. | Locked securely | Pass |
| Functional Test | Mirror glass adjustment | Reconnect the battery and operate the adjustment switch in the up, down, left, and right directions. | Glass moves smoothly in all commanded directions without stalling, clicking, or excessive delay. | 4 directions tested | Pass |
| Functional Test | Folding function | If equipped, activate the folding control and observe one complete fold-and-return cycle. | The housing reaches both positions smoothly and stops without abnormal noise or visible looseness. | 1 cycle completed | Pass |
| Functional Test | Defroster or heating function | If equipped, switch on the mirror heating function and check for gradual warming across the glass after several minutes. | The glass warms evenly; there is no burning odor, damaged wiring, or warning indicator. | Even warming observed | Pass |
| Final Inspection | Door operation and clearance | Open and close the door fully while observing the mirror, door edge, window glass, and adjacent trim. | No contact, rubbing, vibration, or interference occurs throughout the complete door movement. | No interference | Pass |
| Final Inspection | Mirror stability and alignment | Apply light hand pressure to the housing and compare its alignment with the opposite side. Confirm the driver’s viewing angle from the normal seating position. | Housing remains firmly mounted, alignment is level, and the viewing area is unobstructed. | Stable and aligned | Pass |
| Final Inspection | Surface and cleanup check | Inspect the painted housing, mirror glass, door panel, and surrounding trim. Remove fingerprints, protective film, and loose tools. | No scratches, cracks, loose trim, exposed wiring, or installation debris remain. | Clean; no damage | Pass |
Safety note: Do not operate the vehicle until all fasteners are secure, the mirror is stable, and every applicable electrical function has passed inspection.
Please enter the details to download, thank you
Get in Touch With Us
Please enter the details to download, thank you