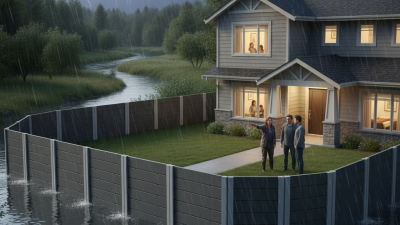
What Is the Best Type of Water Barrier for Flooding?

Floodwater rarely arrives as a neat, predictable line. It can carry debris, pressure, sewage, and hidden electrical hazards. That reality makes “the best” water barrier a risk-based decision, not a marketing claim. The right system depends on flood depth, flow speed, warning time, ground conditions, and building access. Small details matter. A door threshold, drain, or uneven driveway can become the first failure point.

The scale of the problem supports careful planning. The UNDRR Global Assessment Report 2022 records floods as 44% of disaster events from 2000 to 2019. It also reports that floods affected about 1.65 billion people during that period. NOAA’s National Centers for Environmental Information lists flooding among America’s recurring high-cost hazards. FEMA guidance warns that water may enter through doors, walls, foundations, and utilities. These sources do not identify one universal product. They support layered protection, maintained drainage, and realistic performance limits.

This guide compares sandbags, reusable flood panels, inflatable barriers, and modular systems. It examines setup time, storage, reusability, leakage control, anchoring, and moving-water performance. FEMA and the U.S. Army Corps of Engineers emphasize site-specific flood-risk evaluation and proper installation. A barrier that works on a flat driveway may fail beside a sloped garage. That is easy to underestimate. We will also examine independent testing, manufacturer instructions, and replacement requirements. Laboratory results may not reflect debris, waves, or prolonged exposure. The most practical water barriers for flooding are not always the tallest or most expensive. They are matched to a documented hazard, installed early, and inspected before each wet season.
What Is the Best Type of Water Barrier for Flooding?

Define the Hazard: FEMA’s 1% Annual-Chance Flood and 0.3 m Freeboard

What Is the Best Type of Water Barrier for Flooding?

FEMA’s 1% annual-chance flood is often called the “100-year flood.” That phrase can mislead. It does not mean flooding happens only once every century. A property may face this level several times during its lifetime, especially near rivers, drainage channels, or coastal areas.

The first step is identifying the Base Flood Elevation, or BFE. This elevation represents the expected water level during the 1% annual-chance event. A practical design should place occupied floors and critical equipment at least 0.3 meters above the BFE. This added height is called freeboard.

It provides space for uncertain forecasts, wave action, debris, and construction differences.

Barrier choice depends on the site. Temporary flood panels can protect doorways when staff can install them correctly before rising water arrives. Permanent floodwalls may suit exposed entrances, but they require sound foundations and controlled drainage.

In some locations, raised thresholds and sealed utility openings offer better protection than a single large barrier. None is automatic.

I have seen small gaps defeat otherwise strong systems. A poorly sealed corner, open drain, or unprotected garage can let water inside quickly.

Local flood maps, soil conditions, access needs, and emergency warnings should guide the design. Professional elevation checks are worthwhile. Even then, assumptions deserve review.

Water rarely follows a neat drawing.
Compare Sandbags: USACE Profiles Commonly Use a 2:1 Slope Ratio

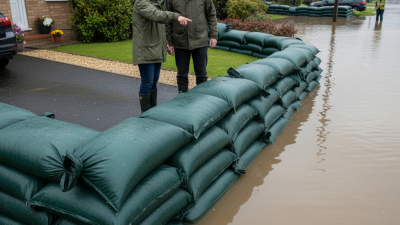
When flooding threatens, the best water barrier depends on water depth, flow speed, soil, and available labor. Sandbags remain practical for short-term protection because they are portable and easy to place by hand. However, a narrow stack can fail quickly when water pushes against it.

USACE profiles commonly use a 2:1 slope ratio for sandbag barriers. This means the barrier extends two units horizontally for every one unit of height. A 2-foot-high wall may need roughly 4 feet of horizontal width on each sloping side. The broad base reduces sliding and overturning. Build on firm, level ground, and remove loose debris first. Stagger each bag like brickwork, with seams facing away from the water. Keep the bags tightly packed.

Small details matter. Place a plastic sheet on the water-facing side, extending beyond the base when conditions allow. Anchor the sheet with additional bags, not sharp objects. Leave no open gaps between layers. Inspect the barrier often, especially after waves, rainfall, or rising water.

The ratio is guidance, not a universal answer. Fast water, soft soil, or greater heights may require a wider design or engineered flood protection. Field crews sometimes build too quickly and underestimate seepage beneath the wall. That mistake is easy to make. Check for wet spots, muddy flows, and sinking sections, then reinforce weak areas before failure spreads. Local emergency officials or qualified engineers should review serious flood risks.

What Is the Best Type of Water Barrier for Flooding?

Sandbag barriers are commonly designed with a 2:1 horizontal-to-vertical slope profile.

The chart shows the horizontal run required on one side of a sandbag barrier at different wall heights. A 2:1 slope means that each 1 foot of vertical rise requires 2 feet of horizontal run. For a symmetrical barrier, the total base width would include the horizontal run on both sides, plus the crest width.

Evaluate Water-Filled Tubes by Height, Flow Velocity, and Seepage

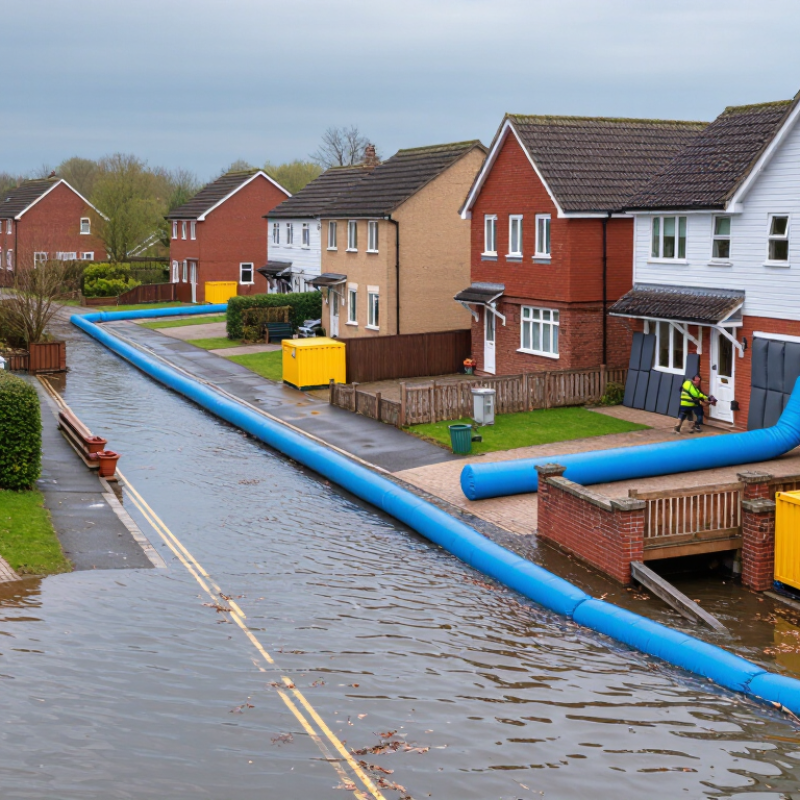
Choosing a flood barrier starts with site measurements, not product appearance. Water-filled tubes can work well on paved ground, but performance depends on geometry and loading. A low tube may stop shallow runoff, yet fail when water rises above its crest. Measure expected flood depth, then add freeboard for waves, debris, and uneven surfaces. Height matters most at openings, driveways, and sloped edges. A tube beside one door may redirect water toward a weaker wall. That detail is easy to miss.

Flow velocity changes the risk quickly. Slow ponding water applies steady pressure. Fast-moving water can roll, shift, or undercut a filled tube before it reaches design height. Inspect the upstream path, nearby drains, and likely debris sources. Use overlapping sections and secure transitions where the barrier changes direction. More height is not always better. An oversized tube may become unstable if its base is narrow or the surface slopes.

Seepage deserves separate attention. Water may travel beneath the tube through cracks, joints, soil pores, or utility openings. Place the barrier on clean, compact ground, and remove sharp debris that could damage its fabric. Check the downstream side during operation; damp streaks can reveal a hidden bypass. A small leak may be manageable, but rising seepage signals poor contact or excessive pressure. Water-filled tubes are useful tools, not guarantees. Test placement before storms, record weak points, and revise the layout honestly after each event.

Test Demountable Panels Against FEMA Flood Elevations and Impact Loads

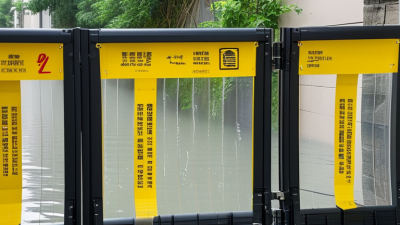
A demountable flood panel should be tested against the site’s Design Flood Elevation, not a convenient laboratory height. FEMA Technical Bulletin 3 requires floodproofed buildings to account for hydrostatic and hydrodynamic forces, seepage, and buoyancy. The Base Flood Elevation usually represents the one-percent-annual-chance flood, but local codes may require additional freeboard above it.

Water is heavy. Its unit weight is about 62.4 pounds per cubic foot, or 9.81 kilonewtons per cubic meter. At one meter of depth, pressure reaches approximately 9.81 kilopascals. A test should examine panel deflection, seal compression, anchor movement, and leakage at this pressure. Small gaps matter.

Impact testing needs equal care. ASCE 24-22 identifies flood loads that can include flowing water and floating debris. A realistic evaluation should consider timber, containers, and vehicle-like impacts, depending on the site. Test the complete system, including joints and corner posts. A panel may survive a static water test yet fail when debris strikes a connection.

That gap is easy to miss.

Field experience also exposes practical weaknesses. Mud can clog tracks. Uneven pavement can reduce seal contact. Repeated installation may damage fasteners. FEMA’s floodproofing guidance supports documented inspections, maintenance, and professional certification, rather than relying on appearance alone. The best evidence combines elevation-specific calculations, controlled impact testing, installation records, and independent engineering review. Even then, uncertainty remains. Real floods rarely behave like test tanks.

What Is the Best Type of Water Barrier for Flooding? — Test Demountable Panels Against FEMA Flood Elevations and Impact Loads

Comparison of common flood-barrier systems and the engineering checks needed for FEMA-related flood elevations
Barrier Type Typical Deployment Reusable? Suitable for Planned Flood Elevation Hydrostatic Water Performance Debris-Impact Considerations Primary Limitations
Demountable rigid panels Panels installed between permanent posts, frames, or door-opening interfaces before flooding Yes, when inspected and stored correctly Commonly suitable for engineered heights from approximately 0.6 to 2.4 m (2 to 8 ft); higher systems require project-specific structural design Must be tested or designed for the project’s expected debris size, velocity, connection strength, and post spacing Requires advance deployment, trained installation, storage space, and a verified foundation or structural attachment
Temporary water-filled barriers Filled with water and placed along relatively level ground or around facilities Usually reusable if not punctured or contaminated Typically used for low to moderate heights; stability decreases on uneven ground or where fast flow occurs Performance depends heavily on ground friction, ballast, continuity, leakage control, and resistance to sliding or overturning Generally vulnerable to sharp debris, concentrated impact, displacement, and damage at joints Requires a suitable surface and may need pumps or drainage control behind the barrier
Sandbags Manually stacked around doorways, low walls, drainage points, and small perimeter sections Limited; bags may degrade after wetting and handling Best suited to low-height, short-duration protection and localized leakage reduction Can reduce shallow water entry when correctly stacked, but leakage and settlement are common Poor resistance to moving water and significant debris impact; stacks can shift or wash out Labor-intensive, slow to deploy, heavy when wet, and difficult to make watertight
Permanent reinforced-concrete flood wall Permanent perimeter or building protection integrated with foundations and drainage systems Yes Can be designed for substantial flood depths and long service life, subject to site-specific engineering Can be designed for impact loads, but gates, penetrations, joints, and adjacent structures remain critical weak points High construction cost, permitting requirements, visual impact, and possible limitations on access or drainage
Deployable fabric or membrane barrier Rolled, folded, or stored in containers and deployed along prepared ground or fixed edges Often reusable after inspection Applicable to selected low- and medium-height projects when anchorage and ground preparation are engineered Depends on membrane tensile strength, anchorage, ballast, seepage control, and protection from puncture Requires careful assessment of puncture, abrasion, sharp debris, and impact at seams and anchors Highly sensitive to installation quality, ground conditions, and damage from objects or vehicles
Example FEMA-Related Elevation and Hydrostatic Load Checks
Example Base Flood Elevation (BFE) Illustrative Freeboard Target Design Flood Elevation (DFE) Water Depth at Barrier Maximum Hydrostatic Pressure at Base Resultant Hydrostatic Force per Metre of Barrier Engineering Meaning
4 ft (1.22 m) 1 ft (0.30 m) 5 ft (1.52 m) 4 ft (1.22 m) 1.73 psi (11.9 kPa) 4.73 kN/m (325 lb/ft) Barrier crest is set 1 ft above the example BFE; connections and foundations must resist the resulting lateral force and overturning effects.
6 ft (1.83 m) 1 ft (0.30 m) 7 ft (2.13 m) 6 ft (1.83 m) 2.60 psi (17.9 kPa) 10.65 kN/m (731 lb/ft) Water force increases with the square of depth; doubling depth produces approximately four times the resultant hydrostatic force.
8 ft (2.44 m) 1 ft (0.30 m) 9 ft (2.74 m) 8 ft (2.44 m) 3.46 psi (23.9 kPa) 18.93 kN/m (1,301 lb/ft) A high demountable system requires detailed design of panel stiffness, post spacing, anchors, seals, adjacent walls, and foundation resistance.
Impact-Load Screening Scenarios for Demountable Panel Testing
Impact Object Assumed Object Mass Impact Speed Approximate Kinetic Energy Items to Inspect After Testing Interpretation
Small timber missile 15 lb (6.8 kg) 34 mph (15.2 m/s) Approximately 580 ft-lb (786 J) Panel deflection, puncture, permanent deformation, post rotation, anchor movement, and seal failure A recognized high-wind/flood-debris screening type in FEMA guidance; the applicable criterion depends on the building, flood zone, and governing design standard.
Large floating object 1,000 lb (454 kg) 10 mph (4.47 m/s) Approximately 2,250 ft-lb (3,050 J) Connection rupture, local panel buckling, foundation movement, sliding, overturning, and leakage Use only as a project-specific scenario after a site debris study; this value is not a universal FEMA requirement.
Decision Summary
Best general choice for a reusable engineered perimeter barrier
Required verification before selection Confirm the applicable FEMA flood map and BFE, local freeboard requirement, design flood elevation, expected flow velocity, debris exposure, soil and foundation conditions, barrier leakage criteria, emergency access needs, and inspection or maintenance procedure.
Technical note: Hydrostatic values use freshwater unit weight of approximately 62.4 lb/ft³ (9.81 kN/m³), with pressure calculated as p = γh and resultant force calculated as F = ½γh² for a one-metre or one-foot-wide vertical barrier segment. BFE, freeboard, DFE, debris criteria, and allowable barrier heights must be confirmed for the specific site and adopted building code. The example values are engineering screening data, not a substitute for a licensed site-specific design.

Choose by Deployment Time, Reusability, Cost per Metre, and Site Access

The best water barrier depends on how quickly flooding may arrive. Temporary sandbags are widely available, but they require many workers and careful placement. Their deployment can take hours, especially around doorways or long property edges. Modular barriers usually install faster when the ground is level and access routes remain clear. Some systems need only a few trained workers. That difference matters during sudden rainfall.

Reusability changes the real cost. A disposable barrier may appear cheap per metre, yet transport, filling, removal, and disposal increase labour costs. Reusable panels often cost more initially, but they can serve through several flood seasons. Inspect seals, connectors, and storage conditions after every event. A damaged component can weaken the entire line. This is easy to underestimate.

Site access may decide the purchase. Narrow gates, soft ground, parked vehicles, and uneven paving can prevent equipment from reaching the installation area. Water-filled barriers are lighter before use, but they need a reliable water source and time to fill. Rigid systems may perform better on firm surfaces, though they demand more storage space. Cost per metre should include labour, transport, maintenance, storage, and replacement parts. No barrier fits every site. A small trial installation can reveal awkward gaps before a real flood tests them.